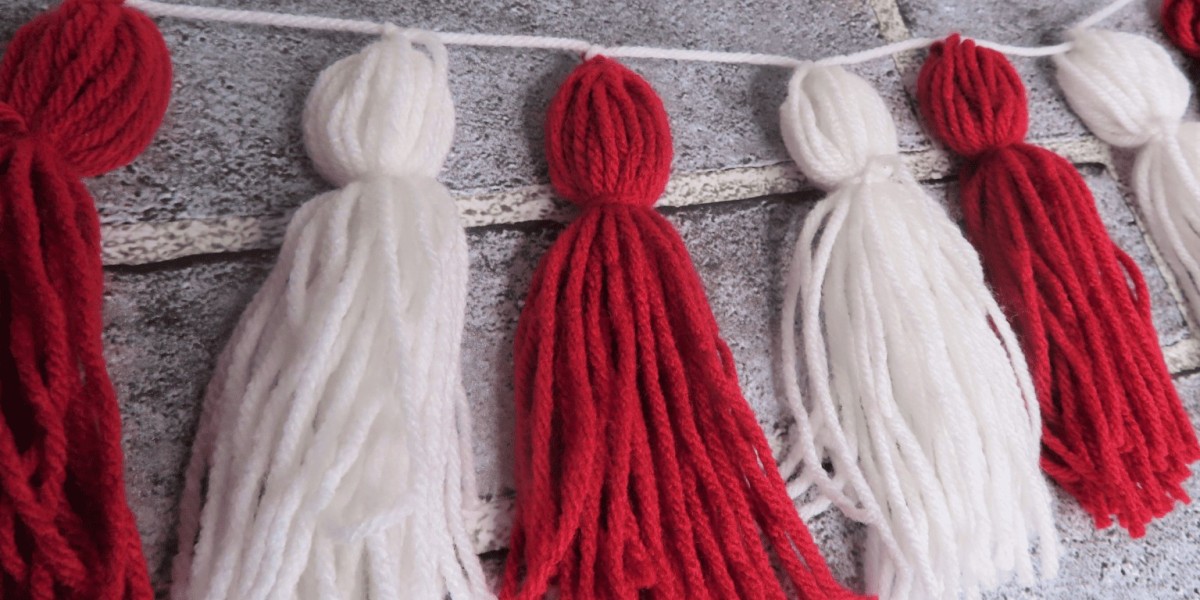
Looking for a simple, fun, and creative way to enhance your next party or event? Why not try making a DIY tassel garland! Tassel garlands are a fantastic way to add a pop of color and a touch of flair to any occasion. The best part? They’re super easy to create, even for those who aren’t particularly crafty.
The great thing about tassel garlands is that they are customizable to any theme or color scheme. With just a few basic supplies, like yarn, you can make a festive decoration in no time. Whether you're preparing for a birthday, a baby shower, or any celebration, a tassel garland adds a playful and vibrant touch to your décor.
In this guide, I’ll walk you through the steps to create your very own tassel garland, from selecting your colors to hanging the final product. Let’s get started!
Materials You'll Need
Before diving into the project, gather the following materials:
- Yarn (in any color of your choice)
- A small book (or any similarly sized object)
- Scissors
- A skewer or a similar tool
- A ruler
- A hot glue gun (optional, if using thicker string for your base)
Step 1: Prepare Your Garland Base
Begin by cutting a long piece of yarn that will serve as the base of your garland. This piece should be as long as you want your final garland to be. This base will hold all your tassels together, so ensure it’s sturdy and matches your chosen color scheme.
Step 2: Create the Tassels
Grab your small book and your yarn. Wrap the yarn around the book horizontally to form the tassel. Wrapping it 20 times is a good starting point, but you can do more or less depending on how thick or thin you want your tassels to be.
After wrapping, slide the yarn to the side of the book where the pages open. Squeeze the yarn together tightly so it stays in a neat bundle.
Step 3: Tie the Tassel
Cut a separate 12-inch piece of yarn. Using a skewer, push the new yarn underneath the bundle of yarn on the book, threading it through the loop formed by the wrapped yarn.
Once you’ve threaded the new yarn through the loop, tie a double knot to secure the bundle in place.
Carefully slide the yarn off the book while keeping it in its bundled shape.
Step 4: Cut and Shape the Tassel
With the yarn now off the book, use your scissors to cut through the bottom loops, creating the tassel’s fringe. Make sure to pull down on the yarn before cutting to ensure that all strands are cut evenly.
Take the two strings from the knot you tied at the top of the tassel and use them to tie the tassel onto the garland base by making another double knot. If you're using thicker rope as your base, you may need to use a hot glue gun instead to secure the tassel.
Step 5: Final Touches on the Tassel
Lay your tassel down flat and comb through the strings with your fingers to ensure they’re neat and straight.
Take another 12-inch piece of yarn and place it horizontally about an inch from the top of the tassel. Tie it in a double knot, forming the "neck" of the tassel.
Finally, trim the bottom of the tassel so that all the strands are even.
Step 6: Assemble the Garland
Repeat the tassel-making process until you have the desired number of tassels. You can stick with one color or alternate colors to create a pattern.
As you attach each tassel to the garland base, use a ruler to ensure even spacing. For a balanced look, aim to place each tassel about two inches apart, though you can adjust this based on your preference.
Continue adding tassels until your garland looks full and festive. Once you're satisfied with the result, your garland is ready to be hung and admired!
Conclusion: Celebrate with Style
And there you have it – a beautiful, hand-crafted tassel garland perfect for any party or event! Whether you’re a seasoned DIYer or a crafting newbie, this project is a fun and creative way to add personality to your celebrations. Plus, it’s easy to customize, meaning you can tailor the colors and style to suit any occasion.
So, what are you waiting for? Grab your supplies and get crafty! Your friends and family will love your new decoration, and you’ll have the satisfaction of knowing you made it yourself. Who knows – you might even inspire others to get in on the tassel garland fun too.
Thanks for joining me on this DIY journey. I hope you enjoy making your tassel garland as much as I did. Be sure to come back for more fun and creative projects in the future!
Designs For Cricut
cricut design
Cricut monogram designs
Cricut Shapes
Unique Cricut Sticker Designs
cricut watercolor projects
Cricut Cutfiles Collection